Stamping Decal Tutorial
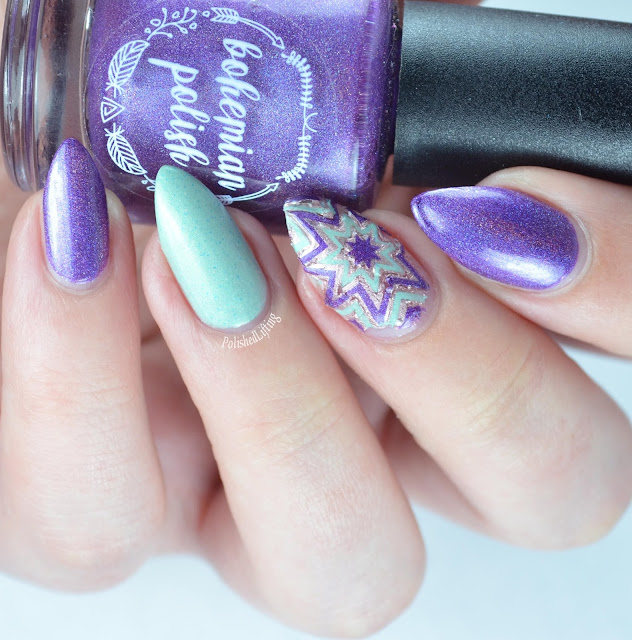
Tuesday, June 14, 2016I thought I would do something a little bit different today. I decided to pair the @clairestelle8challenge prompt (purple) with a stamping decal tutorial. Things didn't turn out quite how I intended, but I figured I would post it anyway as sort of a cautionary tale.
I'm not going to string you along, so here's what happened. The decal went as planned until I went to apply it to my nail. The top coat I used in my first step was the same one I used over the top of the decal when I applied it to my nail. Some kind of chemical reaction happened, and it dissolved a good portion of the decal. I've never, ever had this happen so I'm going to chalk it up to being an incompatible top coat. The rest of the tutorial is full of sound advice, so I felt it would be silly to scrap the whole project.
Step 1
Apply a generous coat of top coat to a silicone mat or a clear, clean sheet protector. I would recommend using a traditional top coat over a quick dry one in this instance. Quick dry top coats have a tendency to crack. Whatever you do, do NOT use a Rainbow Honey scented top coat. That's what caused the disaster you will see in the final photos.
Step 2
Gently stamp over the dry clear coat with a non-sticky stamper. It's especially important that your stamper isn't sticky otherwise you may accidentally lift the whole decal off the mat.
Step 3
Select the tools you wish to use to fill in your decal. I opted for a combination of a small nail art brush and dotting tools.
Step 4
Fill in the blank spaces of your decal. I personally prefer to fill in sections by color so that I don't have to clean my brush off multiple times. In this case, I started with purple.
Step 5
Fill in the rest of the decal with your desired color(s) while being mindful of boundaries. Unlike painting walls, it's generally best to paint slightly over stamped lines to ensure full coverage. The only exclusion to that recommendation would be if your stamping color is sheer. While the decal above looks incredibly sloppy, I assure you that the right side (the one facing the mat) is crisp.
Step 6
Apply a generous clear coat (or base color) to the nail you wish to apply the decal to. If you are applying decals to multiple nails, you will want to repeat steps 6-8 for each nail individually.
Step 7
Gently press your decal onto the nail. Be mindful and try to avoid using too much pressure as it will tear the decal. I apply pressure starting from the middle of the nail and work my way out. At this point, you may find it necessary to clip the decal at the middle point at the tip of your nail to ensure a flat application. Once you feel as though the decal is reasonable adhered, you may trim the edges of the decal so that there is less overhang.
Step 8
Products used
- Bohemian Polish- I'm Miss World
- Essie- Penny Talk
- Firecracker Lacquer- My Heato Mojito
- Rainbow Honey- Twisted Ice Tea Top Coat
- UberChic Beauty- 2-02


0 comments